
maven操作
maven的pom标签说明:
https://developer.aliyun.com/article/983957
maven的setting.xml标签说明:
https://developer.aliyun.com/article/983958
maven使用说明:
https://www.cnblogs.com/melojun/p/15478774.html
https://mvnrepository.com/ –仓库官网地址
maven的生命周期
1 | clean : 清理.删除上次构建的结果,为下一次构建做准备 |
maven指令
mvn(主命令) archetype(插件):generate(目标)
如图:

maven坐标,三个向量加起来就能定位到仓库中唯一的jar包
groupId(公司或组织的id)、artifactId(一个项目或项目中的一个模块id)、version(版本号)
maven核心概念: pom.xml
maven约定的工程目录结构(约定大于配置,配置大于编码),如图:

maven创建web工程,执行执行下面指令即可
1 | mvn archetype:generate -DarchetypeGroupId=org.apache.maven.archetypes |
依赖范围对应设置的枚举值
| scope值 | main-compile | test-compile | package | transfer | dependencyManagement | outer |
|---|---|---|---|---|---|---|
| compile(default) | y | y | y | y | n | n |
| provided | y | y | n | n | n | n |
| runtime | n | n | y | n | n | n |
| test | n | y | n | n | n | n |
| system | n | n | n | n | n | y |
| import | n | n | n | n | y | n |
import应用的例子
1 | <dependencyManagement> |
system应用的例子
1 | <dependency> |
父子工程的继承关系(作用,父工程统一定义所有jar包的依赖管理)
父package的标签值必须为pom. package的枚举值:jar、war、ear、pom
工程聚合,优势如下:
一键执行 Maven 命令:很多构建命令都可以在“总工程”中一键执行。
以 mvn install 命令为例:Maven 要求有父工程时先安装父工程;有依赖的工程时,先安装被依赖的工程。我们自己考虑这些规则会很麻烦。但是工程聚合之后,在总工程执行 mvn install 可以一键完成安装,而且会自动按照正确的顺序执行。
配置聚合之后,各个模块工程会在总工程中展示一个列表,让项目中的各个模块一目了然。
pom之间的层级
超级pom->父pom->当前pom->有效pom
超级pom的默认设置
1 | <project> |
build标签详解
各个子标签的含义:
| 目录名 | 作用 |
|---|---|
| sourceDirectory | 主体源程序存放目录 |
| scriptSourceDirectory | 脚本源程序存放目录 |
| testSourceDirectory | 测试源程序存放目录 |
| outputDirectory | 主体源程序编译结果输出目录 |
| testOutputDirectory | 测试源程序编译结果输出目录 |
| resources | 主体资源文件存放目录 |
| testResources | 测试资源文件存放目录 |
| directory | 构建结果输出目录 |
自定义插件,这个使用场景很少就不列举了,具体查看
http://heavy_code_industry.gitee.io/code_heavy_industry/pro002-maven/chapter09/verse06.html
具体参见博客:
http://heavy_code_industry.gitee.io/code_heavy_industry/pro002-maven/
- mac设置idea自带maven插件的环境变量
mac的idea自带的maven路径:
/Applications/IntelliJ\ IDEA.app/Contents/plugins/maven/lib/maven3
1.在配置环境变量时,空格识别不了;所以把空格改成下划线
2.在~/.zprofile文件下配置环境变量
1 | #Setting PATH for MAVEN |
3.执行生效命令 resource .zprofile
4.执行mvn -v,发现
1 | zsh: permission denied: mvn |
没有权限
5.给idea maven路径授予执行权限
1 | chmod a+x /Applications/IntelliJ_IDEA.app/Contents/plugins/maven/lib/maven3/bin/mvn |
6.再次执行mvn -v,发现环境变量配置成功

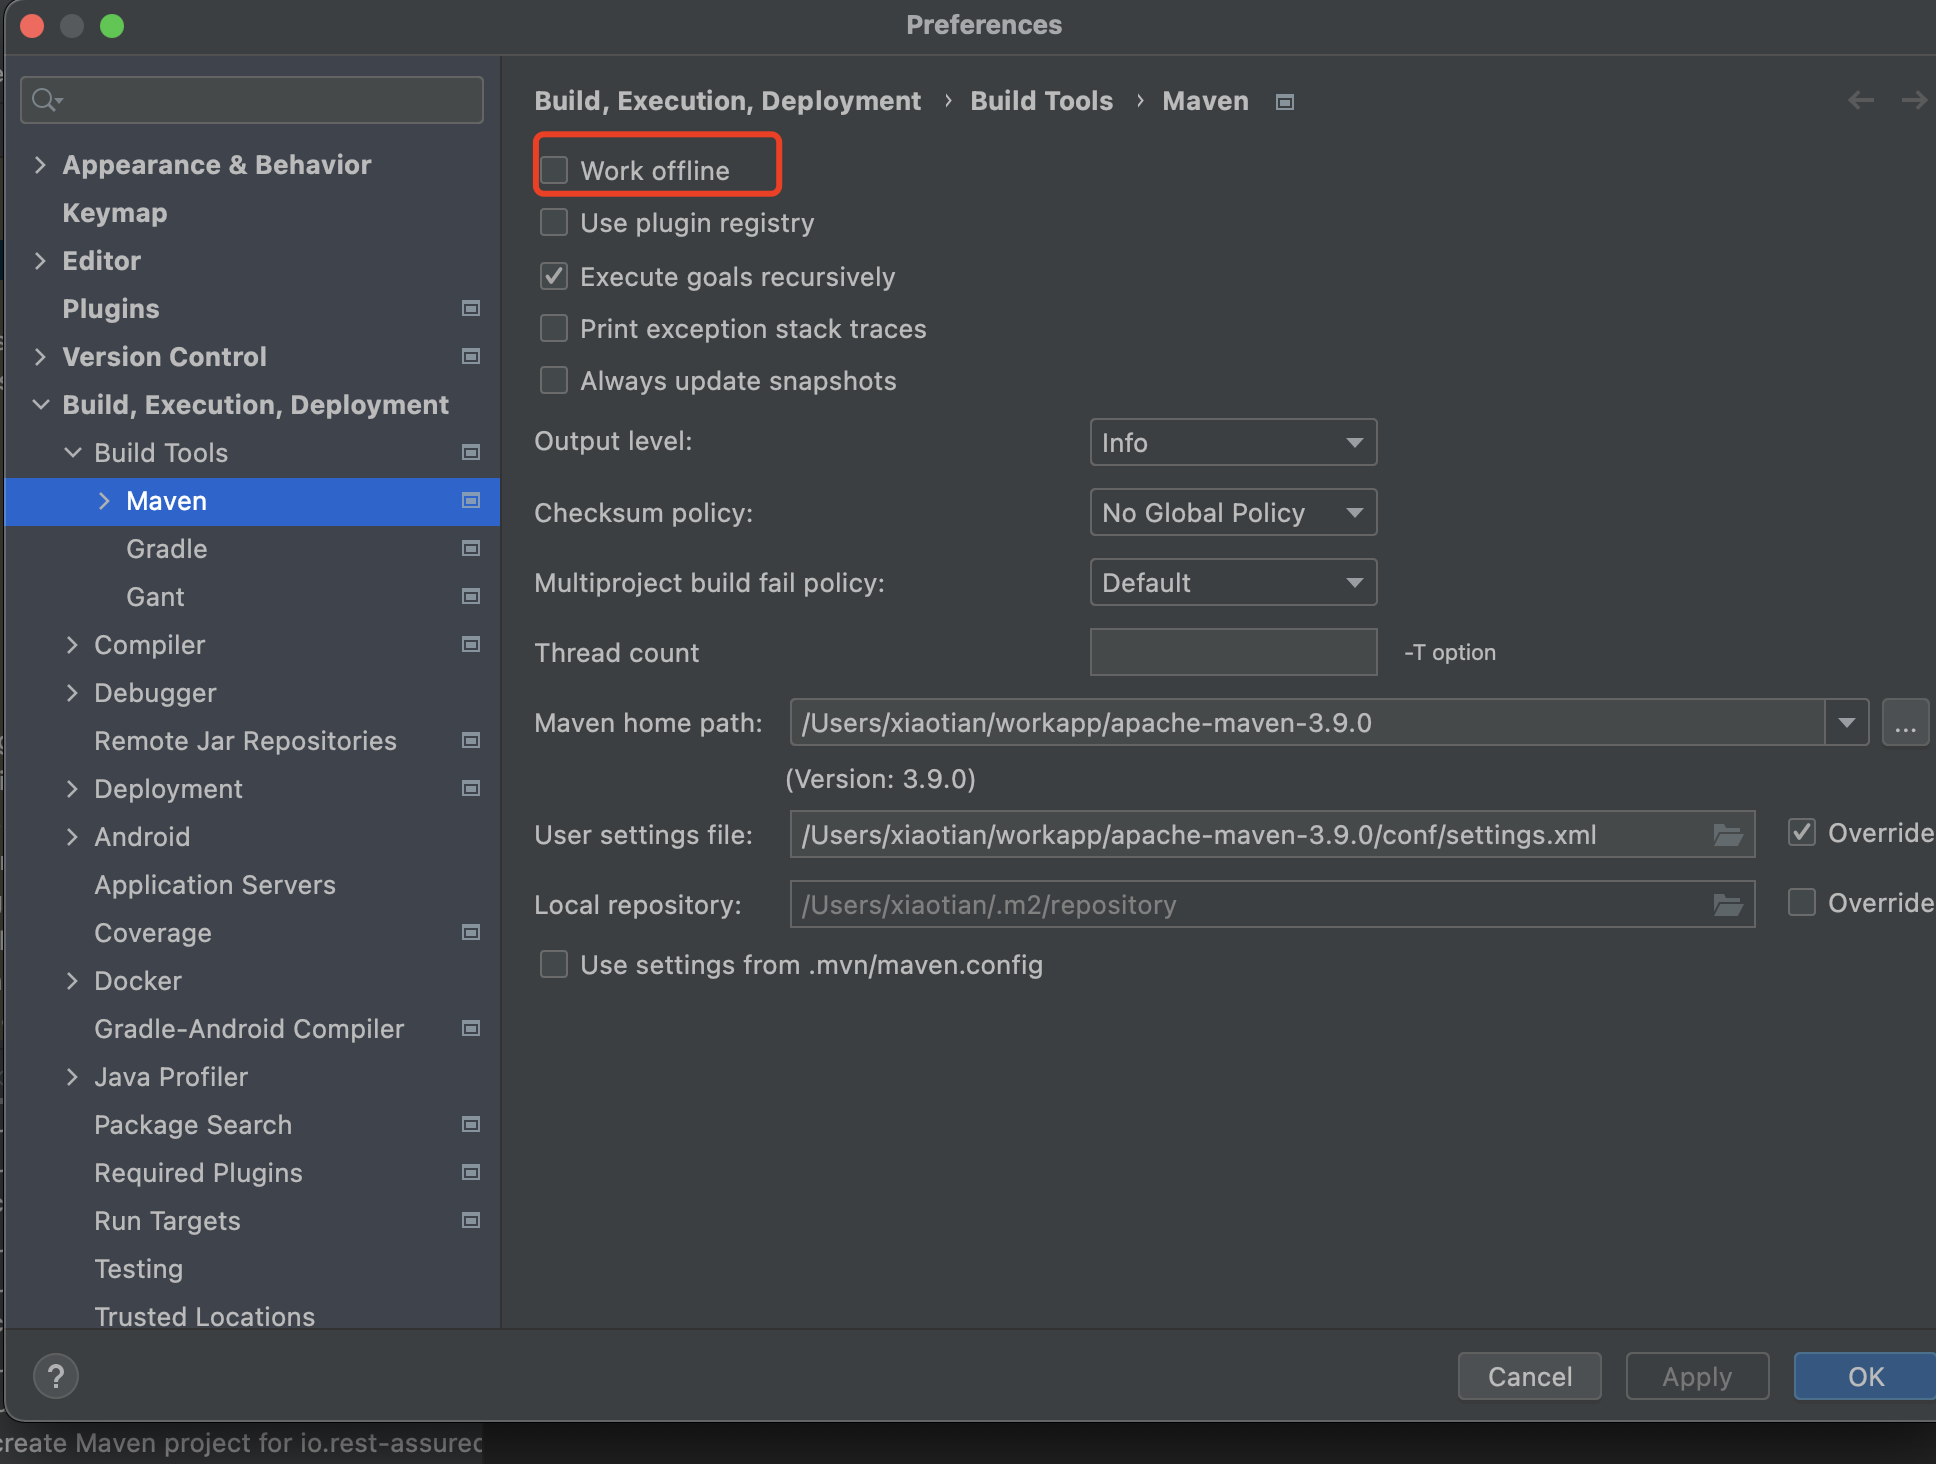
- mvn reimport 操作提示:
Cannot access nexus-aliyun (https://maven.aliyun.com/repository/public) in offline mode原因
问题是因为idea开启了offine mode,关闭该模式再次刷新即可,如图:
2.本地仓库使用maven指令打包
1 | mvn install:install-file -DgroupId=com.oracle.jdbc -DartifactId=ojdbc8 -Dversion=12.2.0.1 -Dpackaging=jar -Dfile=/Users/xiaotian/Documents/剑阁/桌面内容/通用需求/ojdbc8-12.2.0.1.jar |
mvn install:install-file -DgroupId=com.oracle.jdbc -DartifactId=ojdbc8 -Dversion=12.2.0.1 -Dpackaging=jar -Dfile=/Users/xiaotian/Documents/剑阁/桌面内容/通用需求/ojdbc8-12.2.0.1.jar
maven其他笔记补充:
1.设置中央仓库
| <!– 中央仓库1 –> <mirror> <id>repo1</id> <mirrorOf>central</mirrorOf> <name>Human Readable Name for this Mirror.</name> <url>https://repo1.maven.org/maven2/</url> </mirror> <!– 中央仓库2 –> <mirror> <id>repo2</id> <mirrorOf>central</mirrorOf> <name>Human Readable Name for this Mirror.</name> <url>https://repo2.maven.org/maven2/</url> </mirror> <!– 阿里云地址 –> <mirror> <id>alimaven</id> <mirrorOf>central</mirrorOf> <name>Human Readable Name for this Mirror.</name> <url>http://maven.aliyun.com/nexus/content/groups/public/</url> </mirror> |
2.maven常用命令
1.mvn tomcat:run 打包运行编译文件
2.mvn clean 清理,编译后的目录
3.mvn compole 编译,只编译main目录,不编译test中的代码
4.mvn test-compile 编译test目录中的代码
5.mvn test 编译test里面的代码
6.mvn package 打包
根据 artifactId+version+package生成
7.mvn install 发布项目到本地仓库
4.maven命令的生命周期
1.clean: 生命周期clean
2.default:生命周期 compile、test-compile、test、package、install
3.site:生命周期 site
不同的生命周期可以一起执行,例如先clean再compile
5.命令的执行顺序
compile<test-compile<test<package<install
6.maven手动添加插件
生成maven索引
maven编译jdk目录
<groupId>org.apache.maven.plugins</groupId>

<artifactId>maven-compiler-plugin</artifactId>

<version>3.1</version>

<configuration>

    <source>1.8</source>

    <target>1.8</target>

    <encoding>UTF-8</encoding>

    <showWarnings>true</showWarnings>

</configuration>
tomcat插件官网查询;
7.scope属性:
compile:编译 测试 运行 打包 都有效
provide:编译 测试 有效 运行 打包无效
test: 测试 有效 编译 运行 打包 无效
runtime: 编译 无效 测试运行打包有效
8 maven 3.5.4+tomcat 8.5.32 热部署
修改tomcat-user.xml配置文件
9.resources资源放行
10.maven 子项目依赖父项目
子项目
<artifactId>paychannel</artifactId>

<groupId>com.internet.paychannel</groupId>

<version>1.1.5-SNAPSHOT</version>
父项目
<module>paychannel-api</module>

<module>paychannel-biz</module>

<module>paychannel-client</module>
11.maven的依赖传递,与依赖版本管理
1.依赖传递
2.依赖冲突
解决依赖冲突办法:
1.直接申明明确的版本号
2.排除jar包
<exclusion>

    <artifactId>guava</artifactId>

    <groupId>com.google.guava</groupId>

</exclusion>
12 dependencyManagement 生命依赖不是真正引入依赖,进行依赖版本锁定
13:nexus远程仓库建立
1.下载
2.安装 install
3.启动 start
14.maven连接远程仓库
<repository>

    <id>nexus</id>

    <name>Releases</name>

    <url>http://10.0.2.102:8081/nexus/content/repositories/releases/</url>

</repository>

<snapshotRepository>

    <id>nexus</id>

    <name>Snapshots</name>

    <url>http://10.0.2.102:8081/nexus/content/repositories/snapshots/</url>

</snapshotRepository>
配置权限
上传jar包
mvn deploy
maven-解决打包jar到本地仓库
maven编译jar包到本地
mvn install:install-file -DgroupId=com.saicgmac.muse -DartifactId=muse-core -Dversion=2.4.0 -Dpackaging=jar -Dfile=C:\Users\jiange\Desktop\通用需求\muse-core-2.4.0.jar
mvn install:install-file -DgroupId=org.pbccrc.collectclient -DartifactId=client-collect-api -Dversion=0.5.1.0-SNAPSHOT -Dpackaging=jar -Dfile=C:\Users\jiange\Desktop\client-collect-api-0.5.1.0.jar
mvn install:install-file -DgroupId=com.thoughtworks.xstream -DartifactId=xstream -Dversion=1.4.15 -Dpackaging=jar -Dfile=C:\Users\jiange\Desktop\xstream-1.4.15.jar
#server 153 maven的执行命令
/java/maven/apache-maven-3.5.4/bin/mvn install:install-file -DgroupId=com.jslsolucoes -DartifactId=ojdbc6 -Dversion=11.2.0.1.0 -Dpackaging=jar -Dfile=/root/ojdbc6-11.2.0.1.0.jar
/java/maven/apache-maven-3.5.4/bin/mvn install:install-file -DgroupId=com.jslsolucoes -DartifactId=ojdbc6 -Dversion=11.2.0.1.0 -Dpackaging=jar -Dfile=/home/java/ojdbc6-11.2.0.1.0.jar
mvn install:install-file -DgroupId=cn.smallbun.screw -DartifactId=screw-core -Dversion=1.0.5 -Dpackaging=jar -Dfile=/Users/xiaotian/workspace/gitee/screw-v1.0.5/screw-core/target/screw-core-1.0.5.jar
mvn install:install-file -DgroupId=com.microsoft.sqlserver -DartifactId=sqljdbc42 -Dversion=6.0.8112 -Dpackaging=jar -Dfile=/Users/xiaotian/Downloads/sqljdbc42-6.0.8112.jar
/Users/xiaotian/workspace/jiange/svn/huamei/FrontInterface_V1.2.0/WebContent/WEB-INF/lib/sqljdbc42.jar
1 | <dependency> |
mvn install:install-file -DgroupId=com.saicgmac.muse -DartifactId=muse-security -Dversion=2.4.0 -Dpackaging=jar -Dfile=C:\Users\jiange\Desktop\通用需求\muse-security-2.4.0.jar
mvn install:install-file -DgroupId=com.saicgmac.muse -DartifactId=muse-test -Dversion=2.4.0 -Dpackaging=jar -Dfile=C:\Users\jiange\Desktop\通用需求\muse-test-2.4.0.jar
mvn install:install-file -DgroupId=com.jslsolucoes -DartifactId=ojdbc8 -Dversion=12.2.0.1 -Dpackaging=jar -Dfile=C:\Users\jiange\Desktop\通用需求\ojdbc8-12.2.0.1.jar
mvn install:install-file -DgroupId=com.jslsolucoes -DartifactId=ojdbc6 -Dversion=11.2.0.1.0 -Dpackaging=jar -Dfile=C:\Users\Administrator\Desktop\ojdbc6.jar
mac 通用二代征信项目把jar包编译到本地仓库
mvn install:install-file -DgroupId=com.jslsolucoes -DartifactId=ojdbc8 -Dversion=12.2.0.1 -Dpackaging=jar -Dfile=/Users/xiaotian/Documents/剑阁/桌面内容/通用需求/ojdbc8-12.2.0.1.jar
mvn install:install-file -DgroupId=com.saicgmac.muse -DartifactId=muse-security -Dversion=2.4.0 -Dpackaging=jar -Dfile=/Users/xiaotian/Documents/剑阁/桌面内容/通用需求/muse-security-2.4.0.jar
mvn install:install-file -DgroupId=com.saicgmac.muse -DartifactId=muse-test -Dversion=2.4.0 -Dpackaging=jar -Dfile=/Users/xiaotian/Documents/剑阁/桌面内容/通用需求/muse-test-2.4.0.jar
mvn install:install-file -DgroupId=com.saicgmac.muse -DartifactId=muse-core -Dversion=2.4.0 -Dpackaging=jar -Dfile=F:\桌面内容\通用需求\muse-core-2.4.0.jar
mvn install:install-file -DgroupId=org.pbccrc.collectclient -DartifactId=client-collect-api -Dversion=0.5.3.0 -Dpackaging=jar -Dfile=F:\桌面内容\通用需求\client-collect-api-0.5.3.0.jar
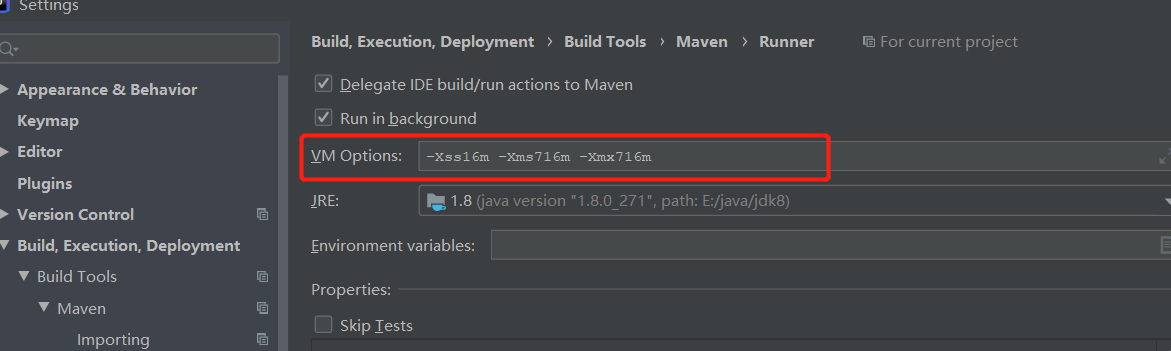
项目引入lombok maven编译出错
循环 1:
输入文件: {com.geping.etl.DFEastBus.repository.dataManage.finance.NetWorksRepository
注释: [org.springframework.stereotype.Repository
最后一个循环: false
解决 加大maven的vm内存
mac maven打包地址
mvn install:install-file -DgroupId=it.sauronsoftware -DartifactId=javabase64 -Dversion=1.3.1 -Dpackaging=jar -Dfile=/Users/xiaotian/Downloads/javabase64-1.3.1/javabase64-1.3.1.jar
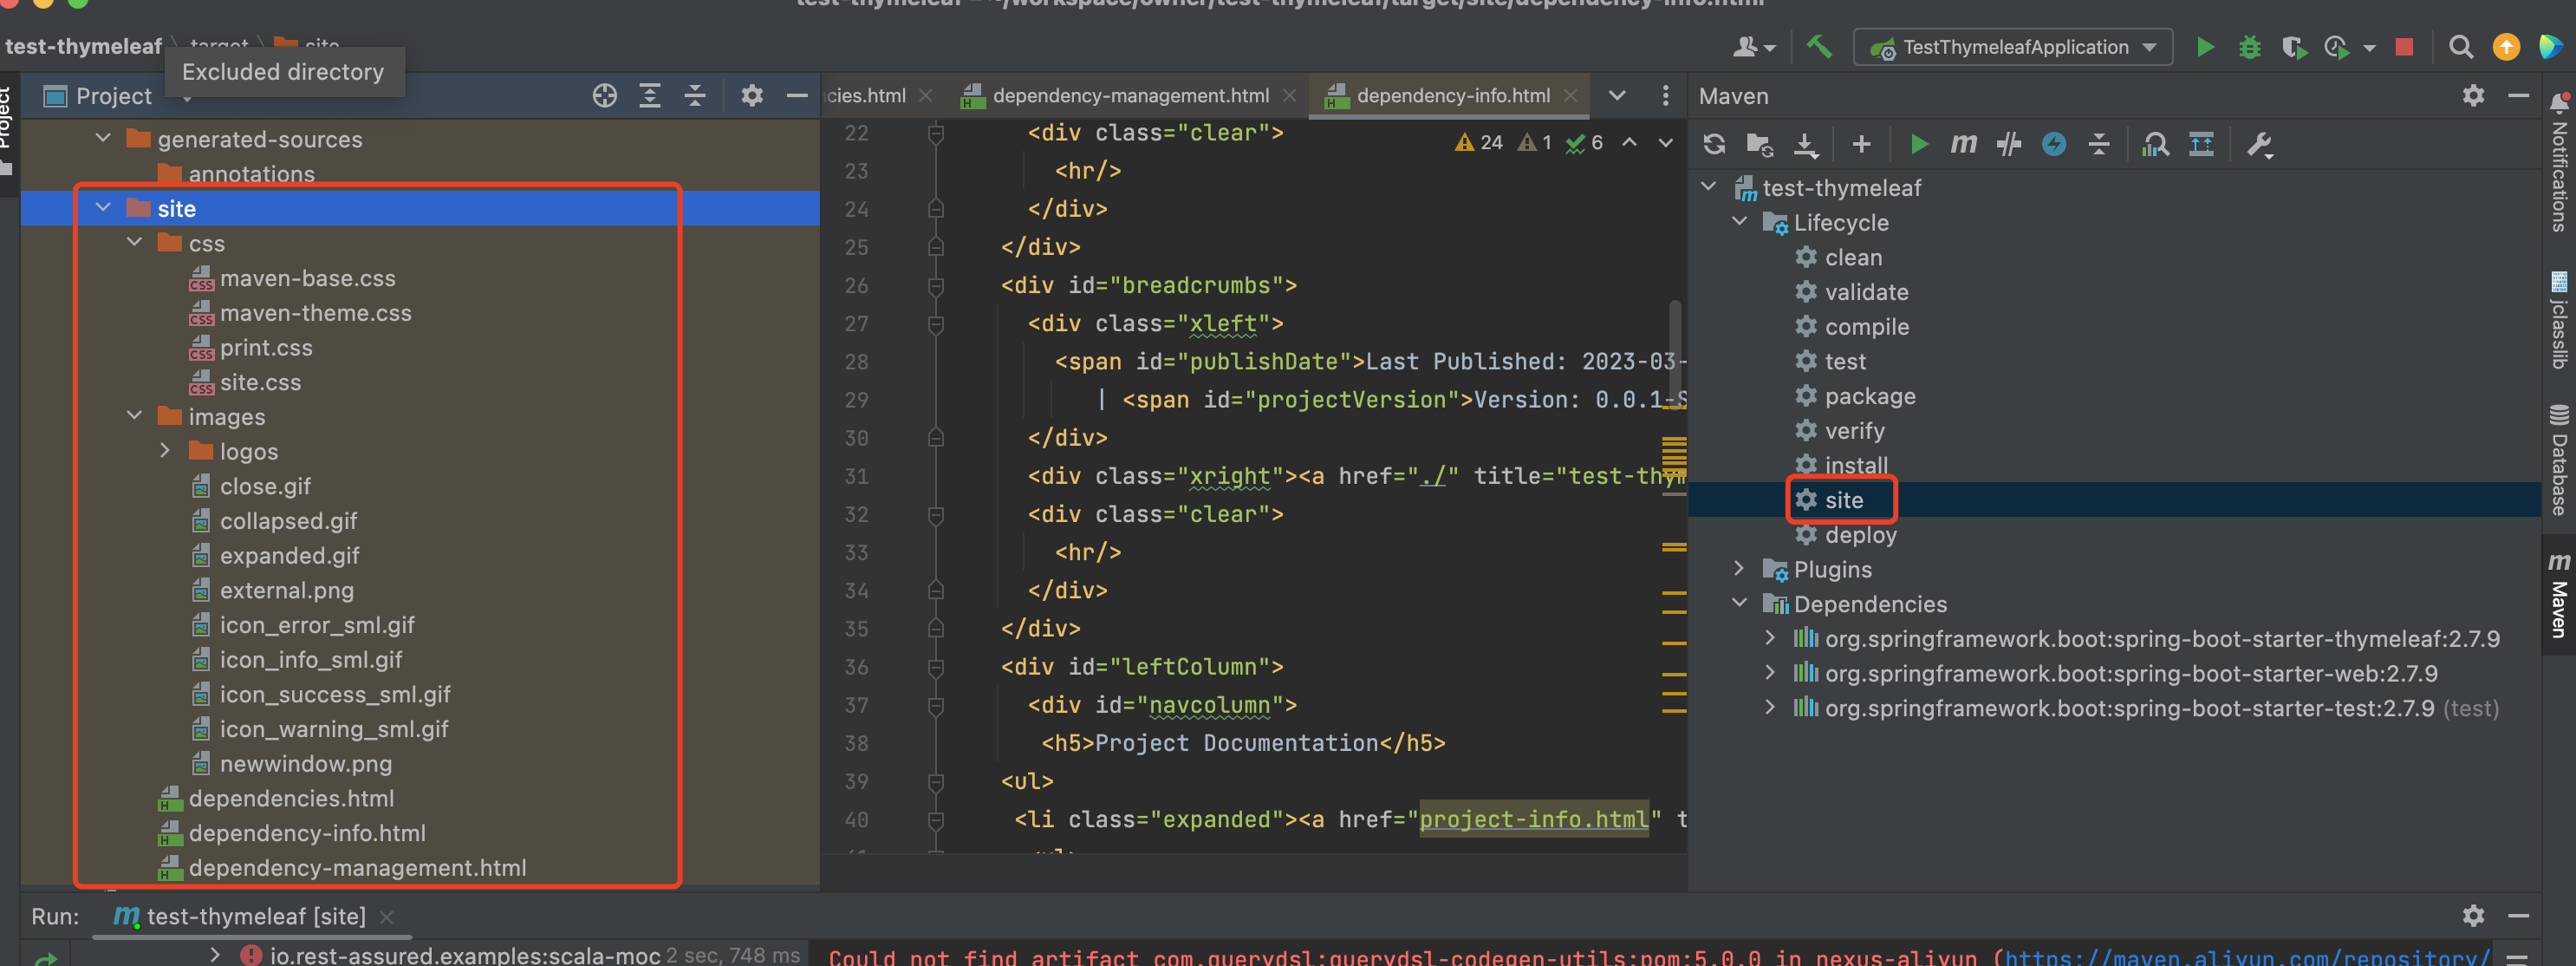
mvn site指令含义:
Apache Maven Site Plugin是Maven项目提供的标准插件之一,用于为Maven项目生成站点(用以生成HTML页面的模块等文档),如果在pom.xml中配置了则其中也包括项目的报告
本地测试打包产生的相关文件信息,如图:
参考博客:
https://blog.csdn.net/taiyangdao/article/details/53909320
–待学习的博客
https://www.cnblogs.com/jingmoxukong/p/6050172.html
https://blog.csdn.net/weixin_43740223/article/details/114253461