vue-icon(图标)
安装icons-vue的包
1
2
3
4
5
6
| # NPM
$ npm install @element-plus/icons-vue
# Yarn
$ yarn add @element-plus/icons-vue
# pnpm
$ pnpm install @element-plus/icons-vue
|
在main.ts内全局注册element-ui的图标组件
1
2
3
4
5
6
7
| // element icons
import * as Icons from "@element-plus/icons-vue";
// 注册element Icons组件
Object.keys(Icons).forEach(key => {
app.component(key, Icons[key as keyof typeof Icons]);
});
|
直接使用官网提供的系统图标库的方式:
官网地址:
https://element-plus.gitee.io/zh-CN/component/icon.html#%E7%9B%B4%E6%8E%A5%E4%BD%BF%E7%94%A8-svg-%E5%9B%BE%E6%A0%87
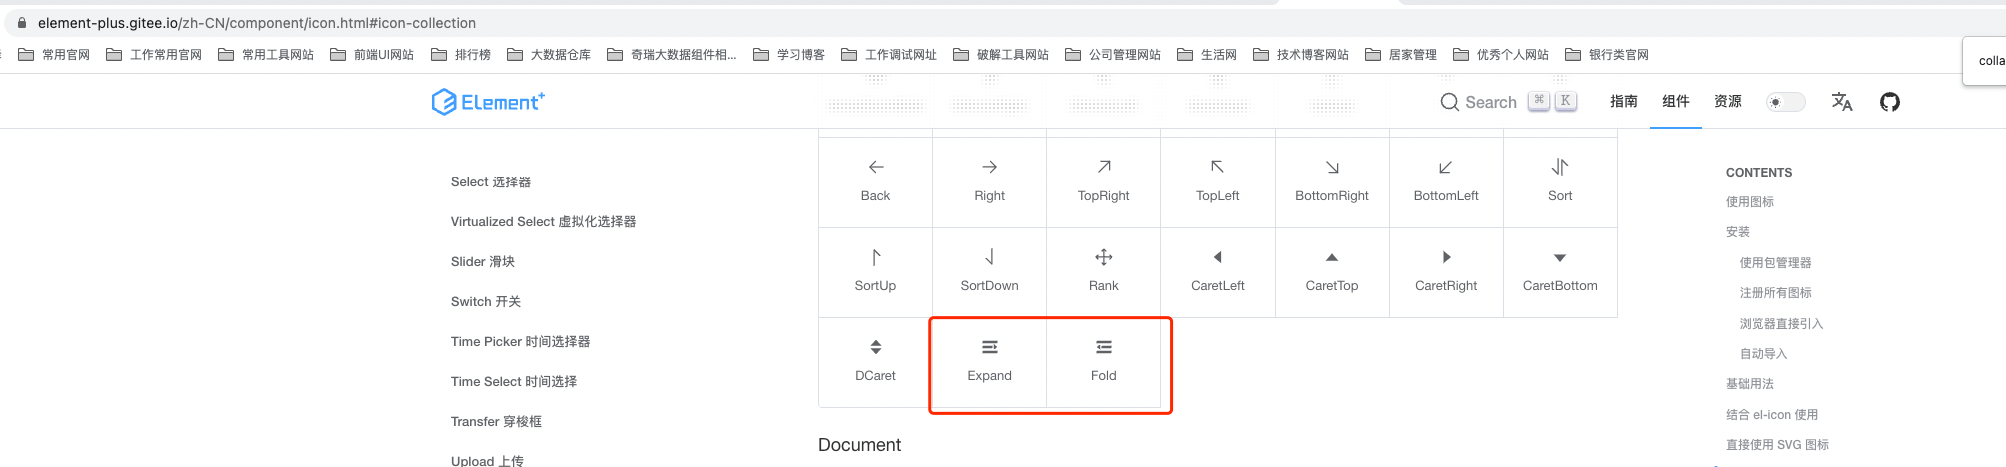
内部vue使用el-icon组件可直接引入,代码示例做了component动态加载
1
2
3
4
5
6
7
8
9
10
11
| <template>
<el-icon class="collapse-icon" @click="collapse">
<component :is="themeConfig.isCollapse ? 'expand' : 'fold'"></component>
</el-icon>
</template>
//也可直接使用
<template>
<el-icon class="collapse-icon" @click="collapse">
<Expand/>
</el-icon>
</template>
|
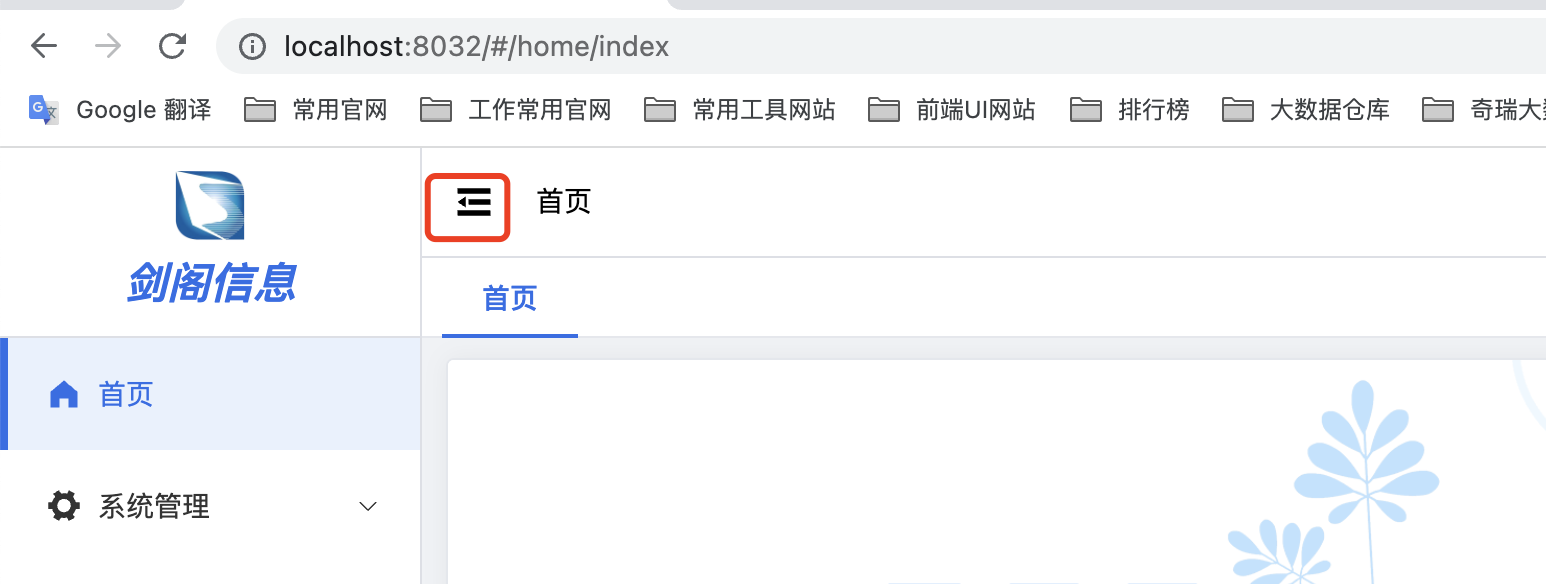
效果如图:
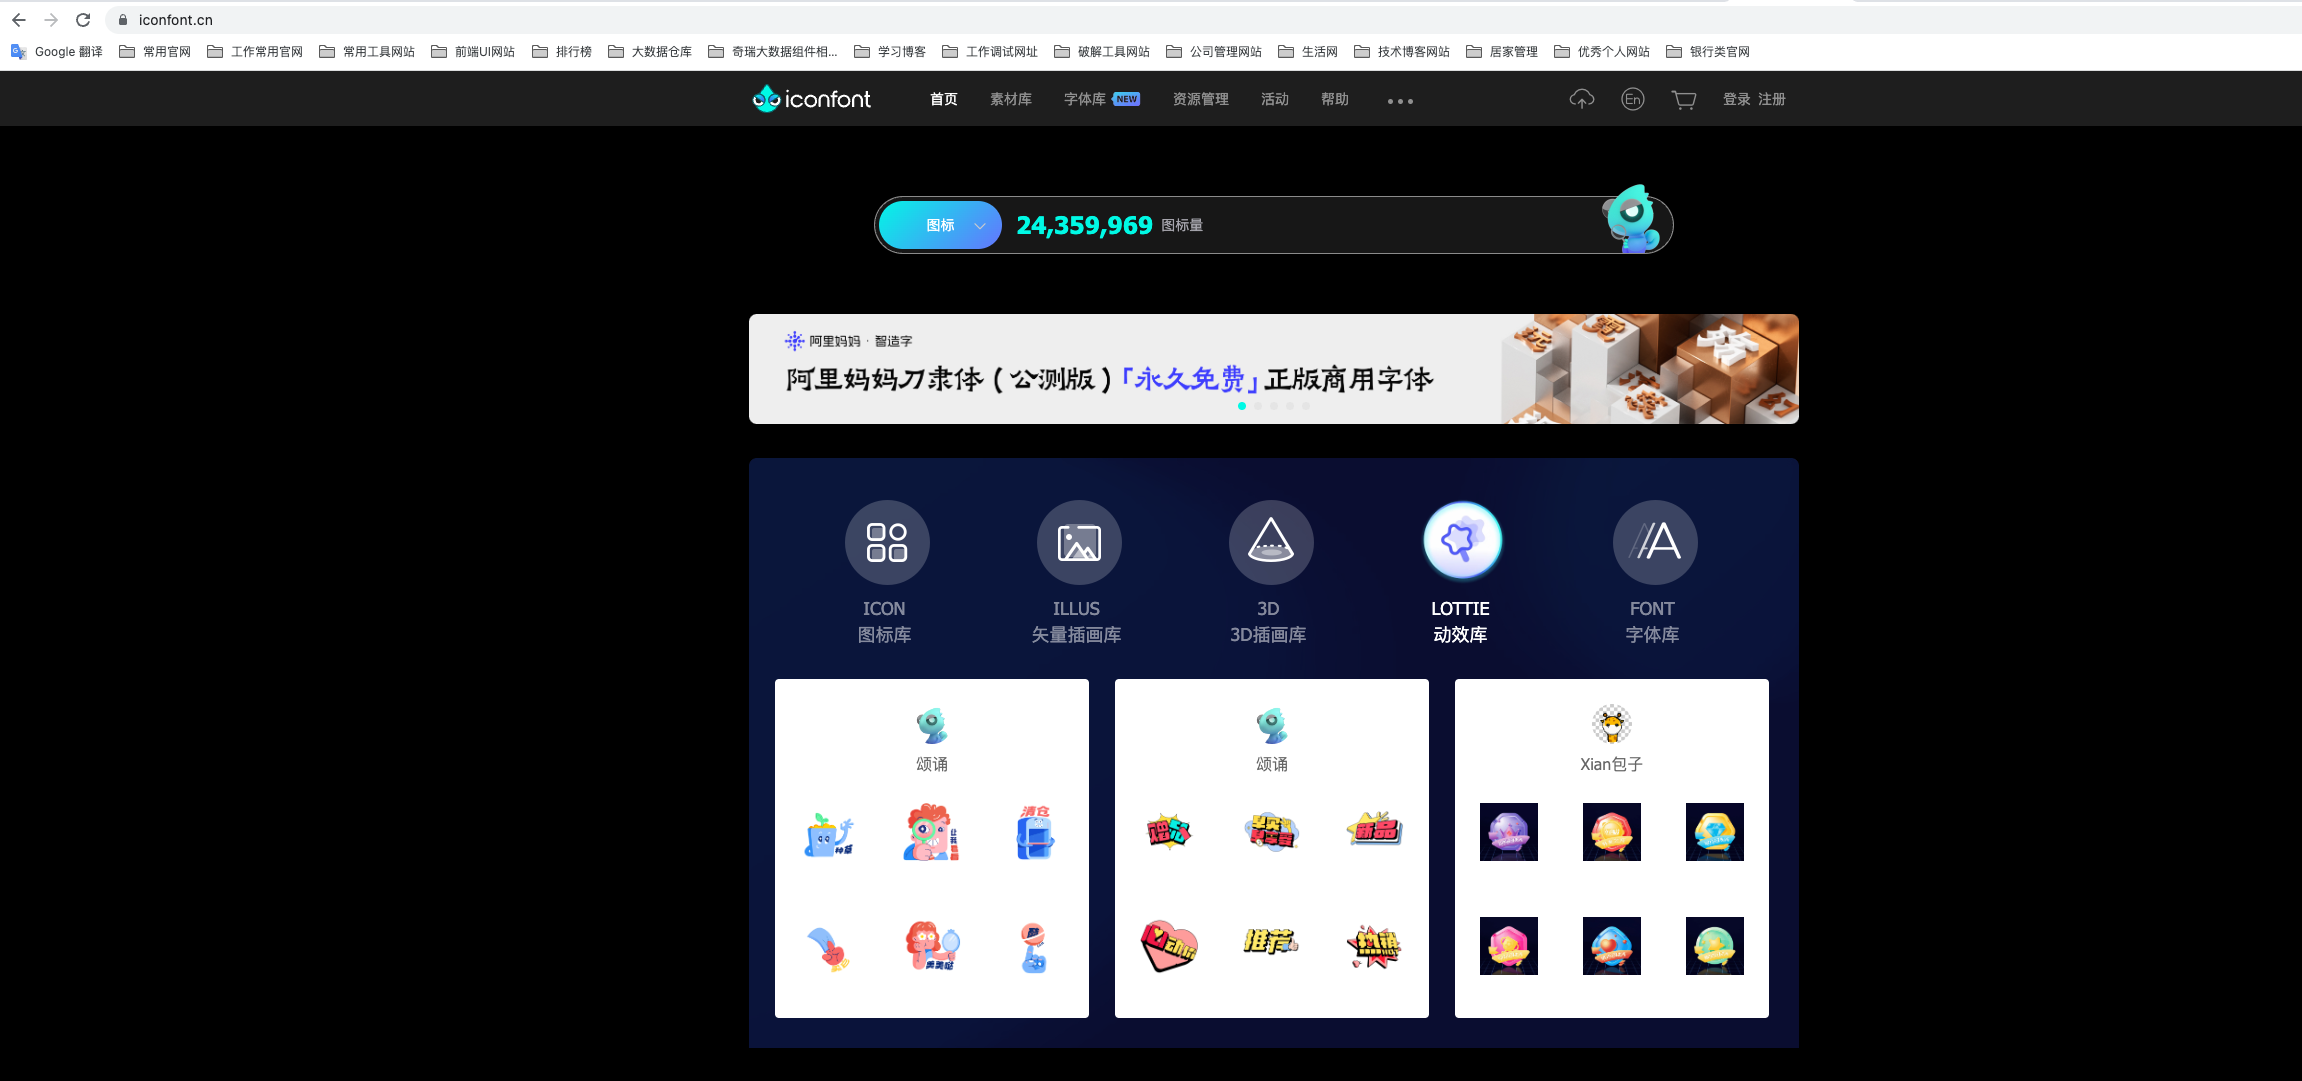
如果觉得官网的图标库组件太少了,也可以使用iconfont官网的图标库
具体el-icon图标库可参见官网:
https://www.iconfont.cn/
现在有2千4百多万的图标还是很给力的
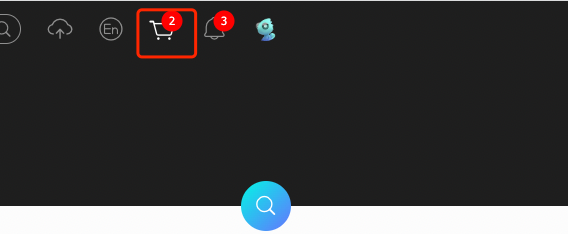
在搜索框里面找自己想要的图标,如中英文,布局库,并一起添加到购物车
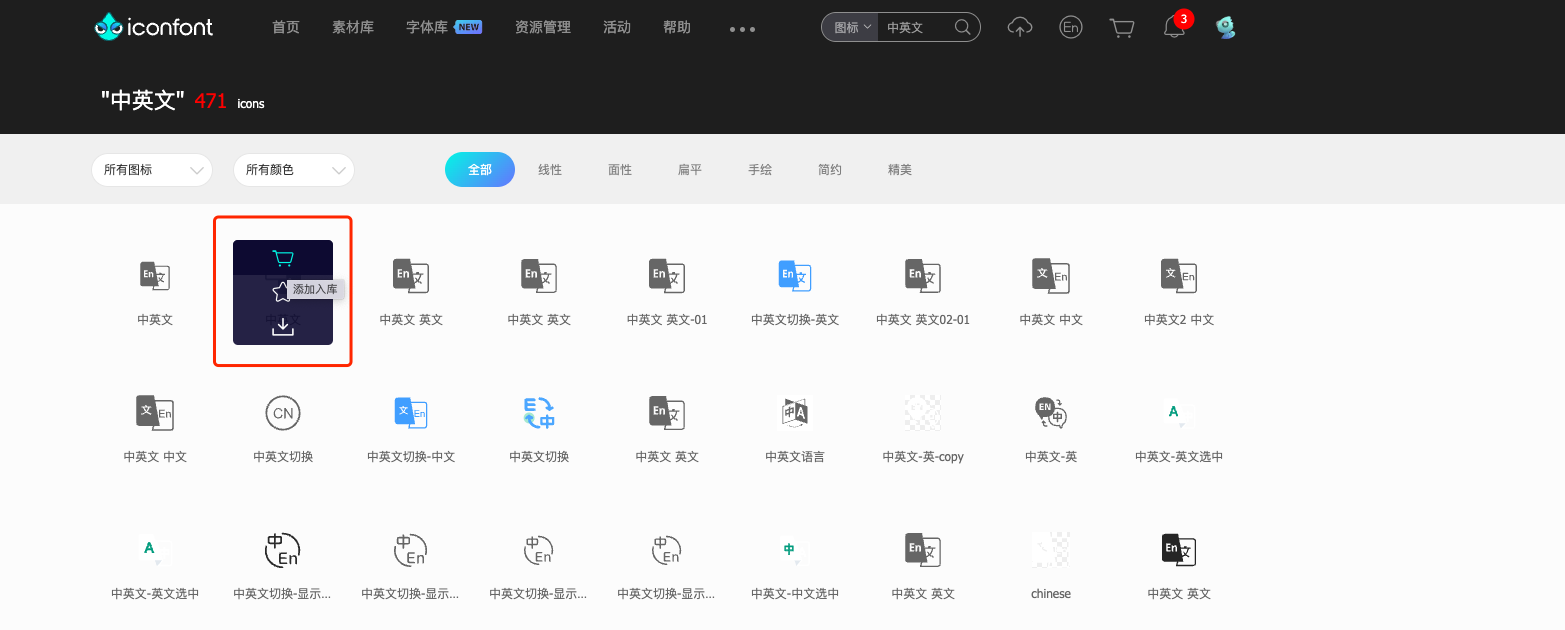
点击购物车,将购物车里面的图标添加至项目(添加至项目是方面图标库的追加迭代)
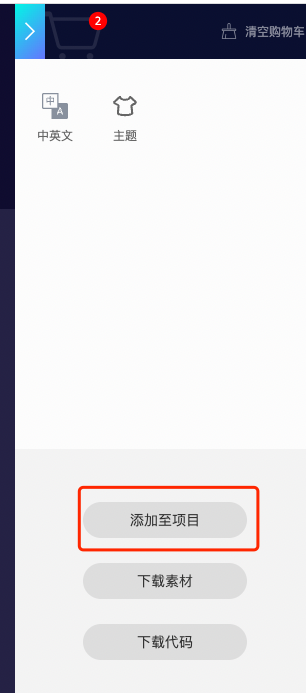
然后将项目里面的图标库下载到本地,然后添加到项目中
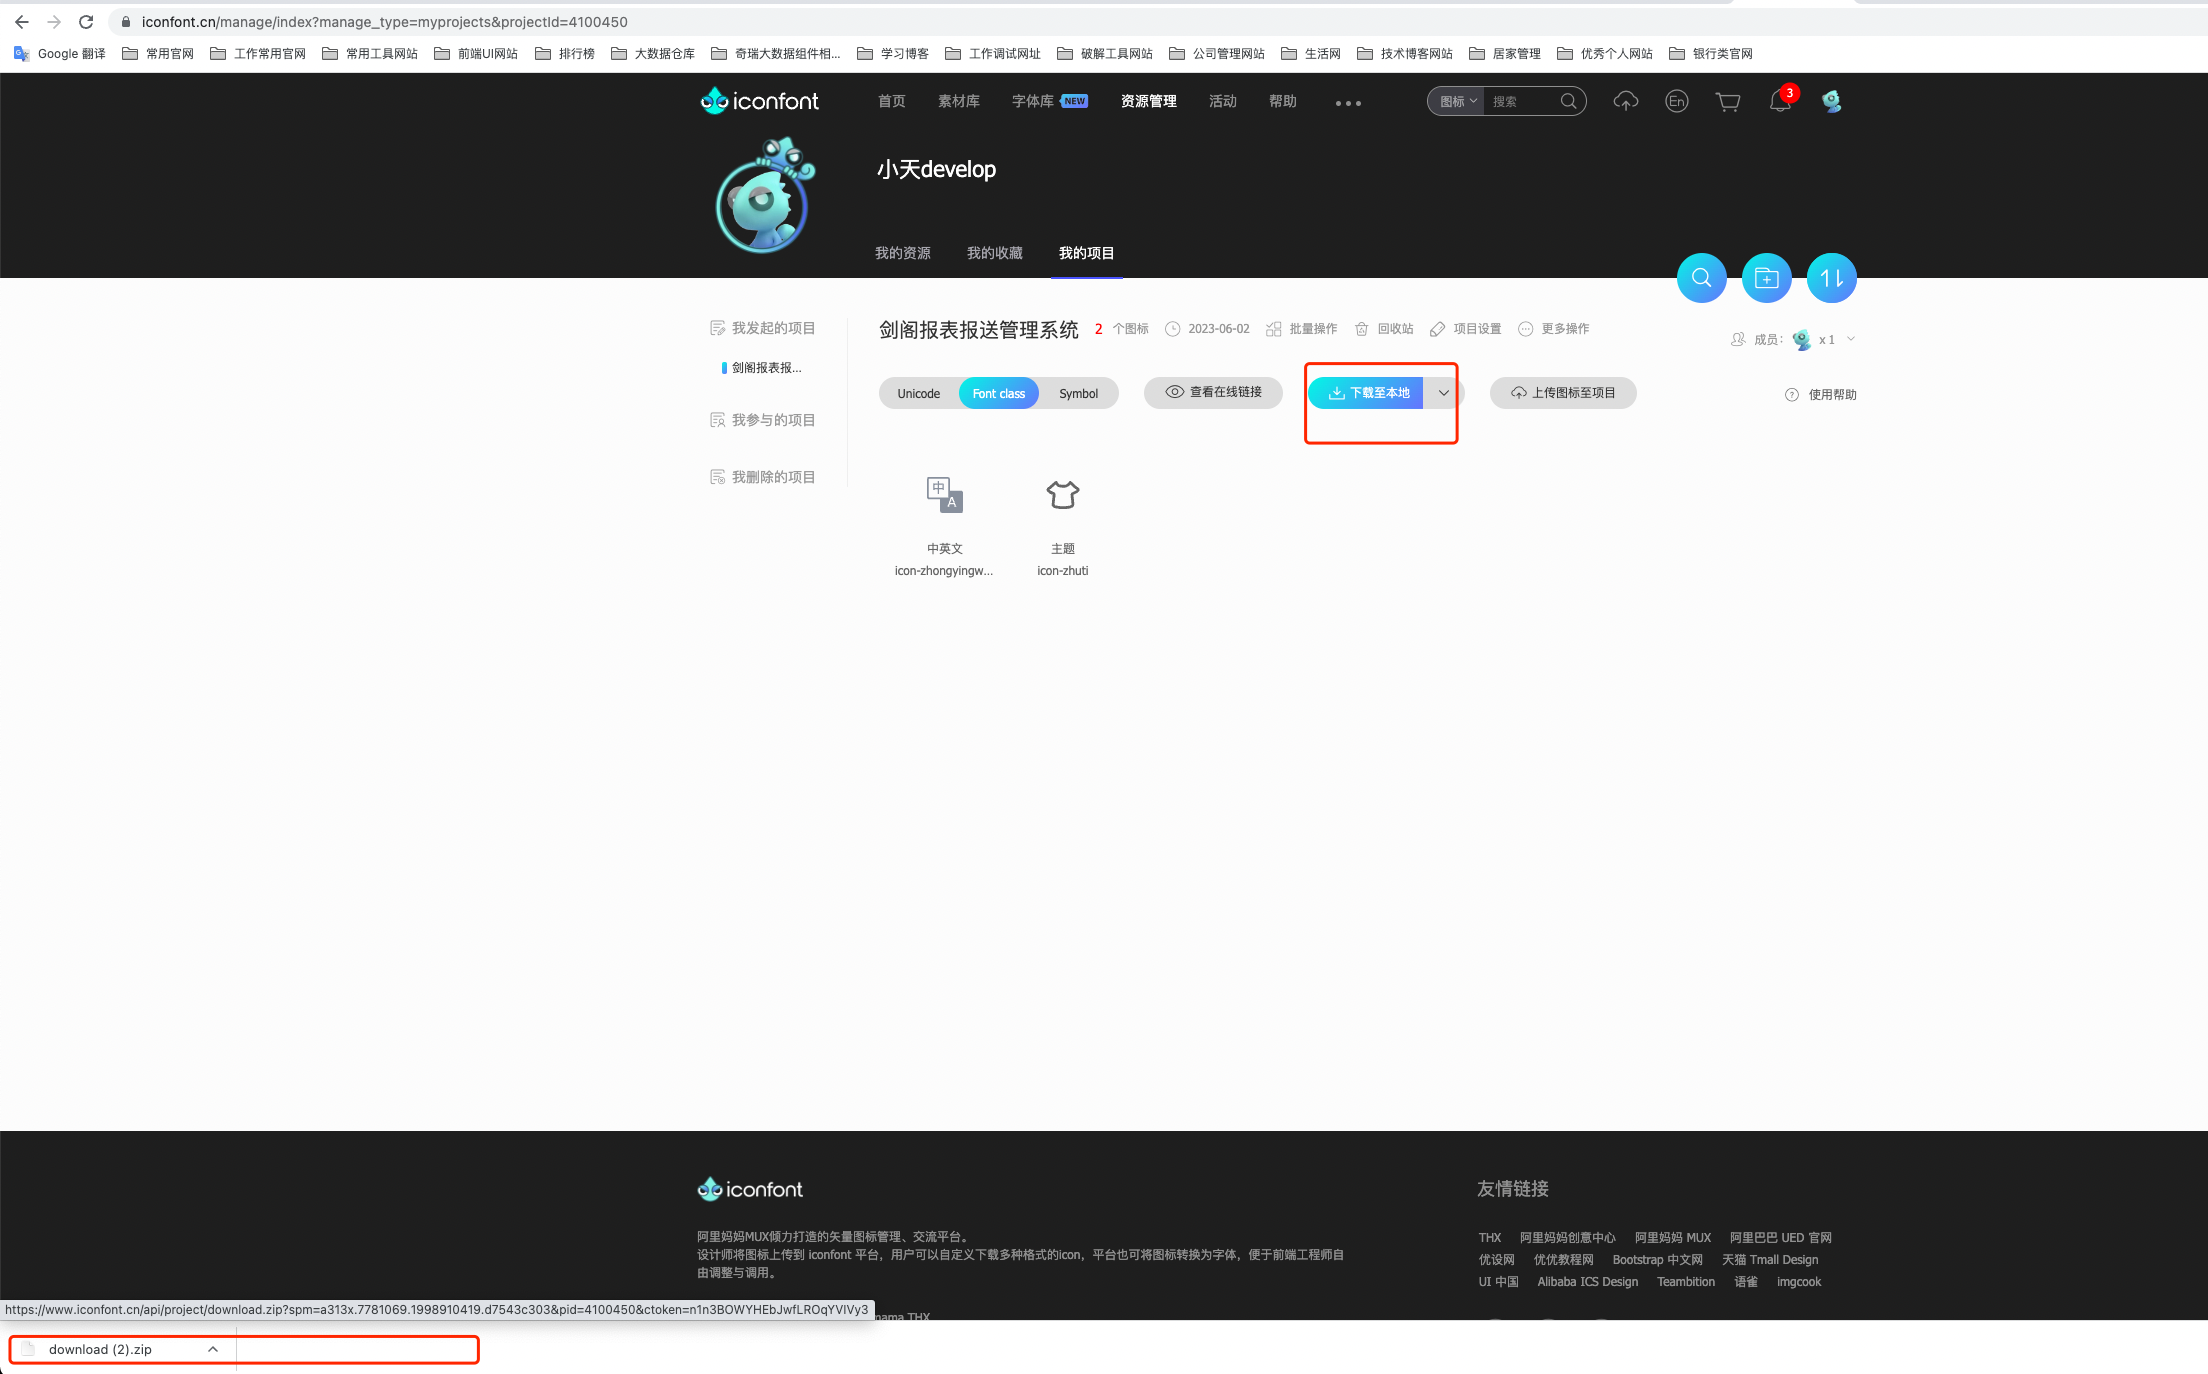
拷贝iconfont.css和iconfont.ttf文件到项目中
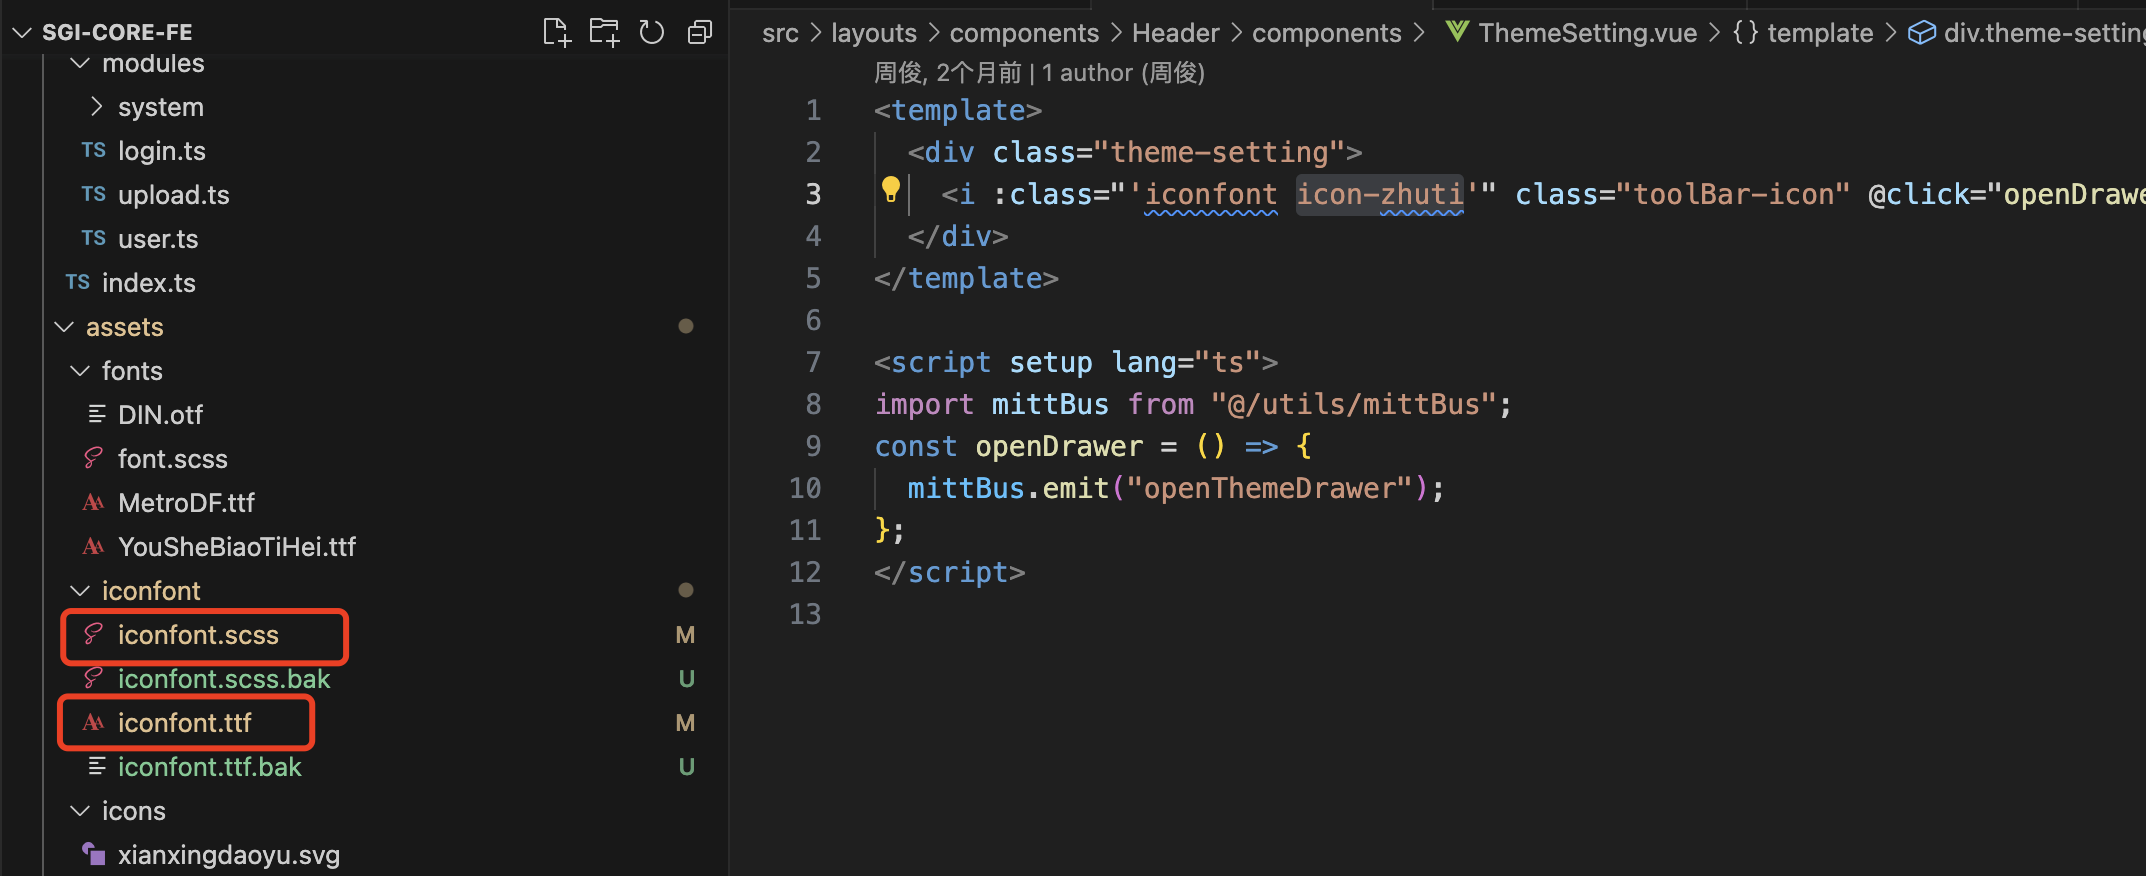
iconfont.ttf为图标元素库,css为引用样式的,代码如下
1
2
3
4
5
6
7
8
9
10
11
12
13
14
15
16
17
18
19
20
21
| @font-face {
font-family: iconfont;
src: url("iconfont.ttf?t=1685672070131") format("truetype");
}
.iconfont {
font-family: iconfont !important;
font-size: 16px;
font-style: normal;
-webkit-font-smoothing: antialiased;
-moz-osx-font-smoothing: grayscale;
}
.icon-zhongyingwen::before {
font-size: 25px; //定义每个图标的大小比例
content: "\e605";
}
.icon-zhuti::before {
content: "\e606";
}
|
并在main.ts全局注册iconfont.scss样式
1
| import "@/assets/iconfont/iconfont.scss";
|
在vue里面引入对应图标库样式的示例
1
2
3
4
5
6
7
8
9
10
11
12
13
14
15
16
17
18
| //主题库引入示例
<template>
<div class="theme-setting">
<i :class="'iconfont icon-zhuti'" class="toolBar-icon" @click="openDrawer"></i>
</div>
</template>
//中英文切换引入示例
<template>
<el-dropdown trigger="click" @command="handleSetLanguage">
<i :class="'iconfont icon-zhongyingwen'" class="toolBar-icon"></i>
<template #dropdown>
<el-dropdown-menu>
<el-dropdown-item :disabled="language && language === 'zh'" command="zh">简体中文</el-dropdown-item>
<el-dropdown-item :disabled="language === 'en'" command="en">English</el-dropdown-item>
</el-dropdown-menu>
</template>
</el-dropdown>
</template>
|
实现效果如下:

Layout(主体布局组件的样式说明)
css中文官网:
https://developer.mozilla.org/zh-CN/docs/Web/CSS
vue的布局代码示例
1
2
3
4
5
6
7
8
9
10
11
12
13
14
15
16
17
18
19
20
21
22
23
24
25
26
27
28
29
30
31
32
33
34
35
36
37
38
39
40
41
42
43
44
45
46
47
48
49
50
51
52
53
54
55
56
57
58
59
60
61
62
63
64
65
66
67
68
69
70
71
72
73
74
75
76
77
78
79
80
81
82
83
84
85
86
87
88
89
90
91
92
93
94
95
96
97
98
99
100
101
102
103
104
105
106
107
108
109
110
111
112
113
114
115
116
117
118
119
120
121
122
123
124
| <!-- 分栏布局 -->
<template>
<el-container class="layout">
<div class="aside-split">
<div class="logo flx-center">
<img src="@/assets/images/logo.png" alt="logo" />
</div>
<el-scrollbar>
<div class="split-list">
<div
class="split-item"
:class="{ 'split-active': splitActive === item.path || `/${splitActive.split('/')[1]}` === item.path }"
v-for="item in menuList"
:key="item.path"
@click="changeSubMenu(item)"
>
<el-icon>
<component :is="item.meta.icon"></component>
</el-icon>
<span class="title">{{ item.meta.title }}</span>
</div>
</div>
</el-scrollbar>
</div>
<el-aside :class="{ 'not-aside': !subMenu.length }" :style="{ width: isCollapse ? '65px' : '210px' }">
<div class="logo flx-center">
<span v-show="subMenu.length">{{ $t("layout.shortCompany") }}</span>
</div>
<el-scrollbar>
<el-menu
:default-active="activeMenu"
:router="false"
:collapse="isCollapse"
:collapse-transition="false"
:unique-opened="true"
background-color="#ffffff"
>
<SubMenu :menuList="subMenu" />
</el-menu>
</el-scrollbar>
</el-aside>
<el-container>
<el-header>
<ToolBarLeft />
<ToolBarRight />
</el-header>
<Main />
</el-container>
</el-container>
</template>
<script setup lang="ts" name="layoutColumns">
import { ref, computed, watch } from "vue";
import { useRoute, useRouter } from "vue-router";
import { GlobalStore } from "@/stores";
import { AuthStore } from "@/stores/modules/auth";
import Main from "@/layouts/components/Main/index.vue";
import ToolBarLeft from "@/layouts/components/Header/ToolBarLeft.vue";
import ToolBarRight from "@/layouts/components/Header/ToolBarRight.vue";
import SubMenu from "@/layouts/components/Menu/SubMenu.vue";
const route = useRoute();
const router = useRouter();
const authStore = AuthStore();
const globalStore = GlobalStore();
const activeMenu = computed(() => (route.meta.activeMenu ? route.meta.activeMenu : route.path));
const menuList = computed(() => authStore.showMenuListGet);
const isCollapse = computed(() => globalStore.themeConfig.isCollapse);
const subMenu = ref<Menu.MenuOptions[]>([]);
const splitActive = ref<string>("");
watch(
() => [menuList, route],
() => {
// 当前菜单没有数据直接 return
if (!menuList.value.length) return;
splitActive.value = route.path;
const menuItem = menuList.value.filter(
(item: Menu.MenuOptions) => route.path === item.path || `/${route.path.split("/")[1]}` === item.path
);
if (menuItem[0].children?.length) return (subMenu.value = menuItem[0].children);
subMenu.value = [];
},
{
deep: true,
immediate: true
}
);
// 切换 SubMenu
const changeSubMenu = (item: Menu.MenuOptions) => {
splitActive.value = item.path;
if (item.children?.length) return (subMenu.value = item.children);
subMenu.value = [];
router.push(item.path);
};
</script>
<style scoped lang="scss">
@import "./index.scss";
</style>
<style lang="scss">
.columns {
.el-menu,
.el-menu--popup {
.el-menu-item {
&.is-active {
background: var(--el-color-primary-light-9);
&::before {
position: absolute;
top: 0;
right: 0;
bottom: 0;
width: 4px;
content: "";
background: var(--el-color-primary);
}
}
}
}
}
</style>
|
index.scss样式文件
1
2
3
4
5
6
7
8
9
10
11
12
13
14
15
16
17
18
19
20
21
22
23
24
25
26
27
28
29
30
31
32
33
34
35
36
37
38
39
40
41
42
43
44
45
46
47
48
49
50
51
52
53
54
55
56
57
58
59
60
61
62
63
64
65
66
67
68
69
70
71
72
73
74
75
76
77
78
79
80
81
82
83
84
85
86
87
88
89
90
91
92
93
94
95
96
97
98
99
100
101
102
103
104
105
106
107
| .el-container {
width: 100%;
height: 100%;
.aside-split {
display: flex;
flex-direction: column;
flex-shrink: 0;
width: 70px;
height: 100%;
background-color: #ffffff;
border-right: 1px solid var(--el-border-color);
.logo {
box-sizing: border-box;
height: 55px;
border-bottom: 1px solid var(--el-border-color);
img {
width: 32px;
object-fit: contain;
}
}
.el-scrollbar {
height: calc(100% - 55px);
.split-list {
flex: 1;
.split-item {
display: flex;
flex-direction: column;
align-items: center;
justify-content: center;
height: 70px;
cursor: pointer;
transition: all 0.3s ease;
&:hover {
background-color: var(--el-color-primary);
}
.el-icon {
font-size: 21px;
}
.title {
margin-top: 6px;
font-size: 12px;
transform: scale(0.96);
}
.el-icon,
.title {
color: #333333;
}
}
.split-active {
background-color: $primary-color !important;
.el-icon,
.title {
color: #ffffff;
}
}
}
}
}
.el-aside {
display: flex;
flex-direction: column;
height: 100%;
overflow: hidden;
background-color: #ffffff;
border-right: 1px solid var(--el-border-color);
transition: all 0.3s ease;
.el-scrollbar {
height: calc(100% - 55px);
.el-menu {
overflow-x: hidden;
border-right: none;
}
}
.logo {
box-sizing: border-box;
height: 55px;
border-bottom: 1px solid var(--el-border-color);
span {
font-size: 24px;
font-style: Oblique;
font-weight: bold;
color: var(--el-color-primary);
white-space: nowrap;
}
}
}
.not-aside {
width: 0 !important;
}
.el-header {
box-sizing: border-box;
display: flex;
align-items: center;
justify-content: space-between;
height: 55px;
padding: 0 15px;
background-color: #ffffff;
border-bottom: 1px solid var(--el-border-color);
:deep(.tool-bar-ri) {
.toolBar-icon,
.username {
color: var(--el-text-color-primary);
}
}
}
}
|
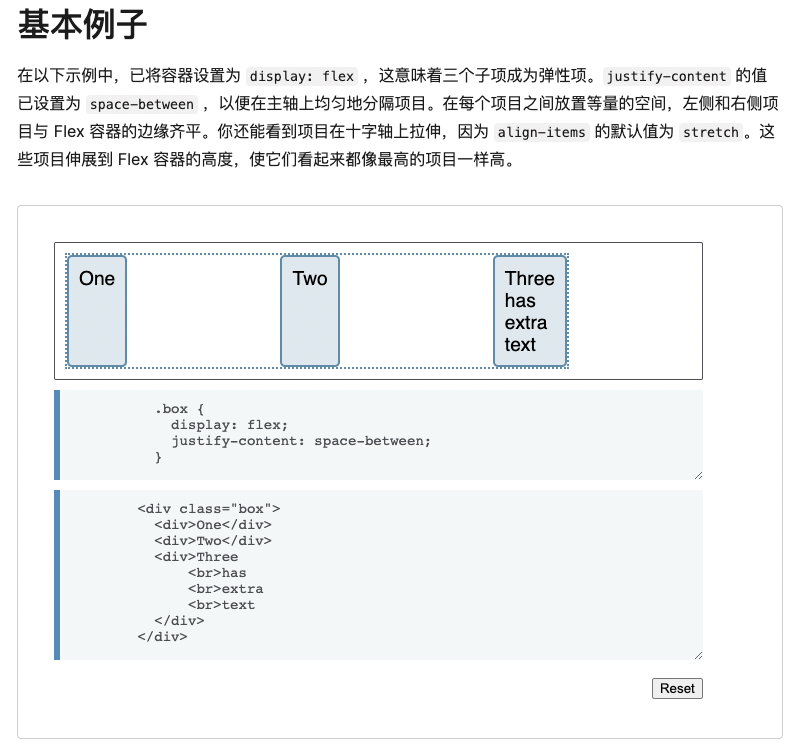
display的flex布局示例:
问题:
修改el-desc组件的子组件item的label的样式(默认一直为200px)
解决办法:
1
2
3
4
5
6
7
8
9
| //在el-descriptions定义class名称,
<el-descriptions :column="1" class="orgEl_desc_class" border>
//底下引入style标签使用!important方式使其生效,如图:
<style>
/* .el-descriptions__label自定义样式 */
.orgEl_desc_class .el-descriptions__label {
width: 230px !important;
}
</style>
|
组件内文字显示在一行,可以用white-space: nowrap;的自定义样式
追加:
使用 overflow: hidden; 超过会隐藏
使用 text-overflow: ellipsis; 超出的部分用省略号表示
span内的文字独占一行剧中显示
display:block,让span形成块(独占一行),就像DIV一样,在设置内容居中css text-align:center。
Css布局全局参数整理
1
2
3
4
5
6
7
8
9
10
11
12
13
14
15
16
17
18
19
20
21
22
23
24
25
26
| 1.在配置文件里面定义好整理配置参数
// 主体布局框架框高度设置
export const LAYOUT_MENU_WIDTH: string = "330px";
export const LAYOUT_MENU_COLLAPSE_WIDTH: string = "65px";
export const LAYOUT_HEAD_HEIGHT: string = "55px";
2.在document的style设置属性元素
// 初始化 theme 布局布局框高比
const initThemeWidth = () => {
document.documentElement.style.setProperty("--layout-menu-width", LAYOUT_MENU_WIDTH);
document.documentElement.style.setProperty("--layout-menu-collapse-width", LAYOUT_MENU_COLLAPSE_WIDTH);
document.documentElement.style.setProperty("--layout-head-height", LAYOUT_HEAD_HEIGHT);
};
3.在app入口进行初始化加载
import { useTheme } from "@/hooks/useTheme";
const { initTheme } = useTheme();
initTheme();
4.对应css文件里面加载使用
width: var(--layout-menu-width);
|
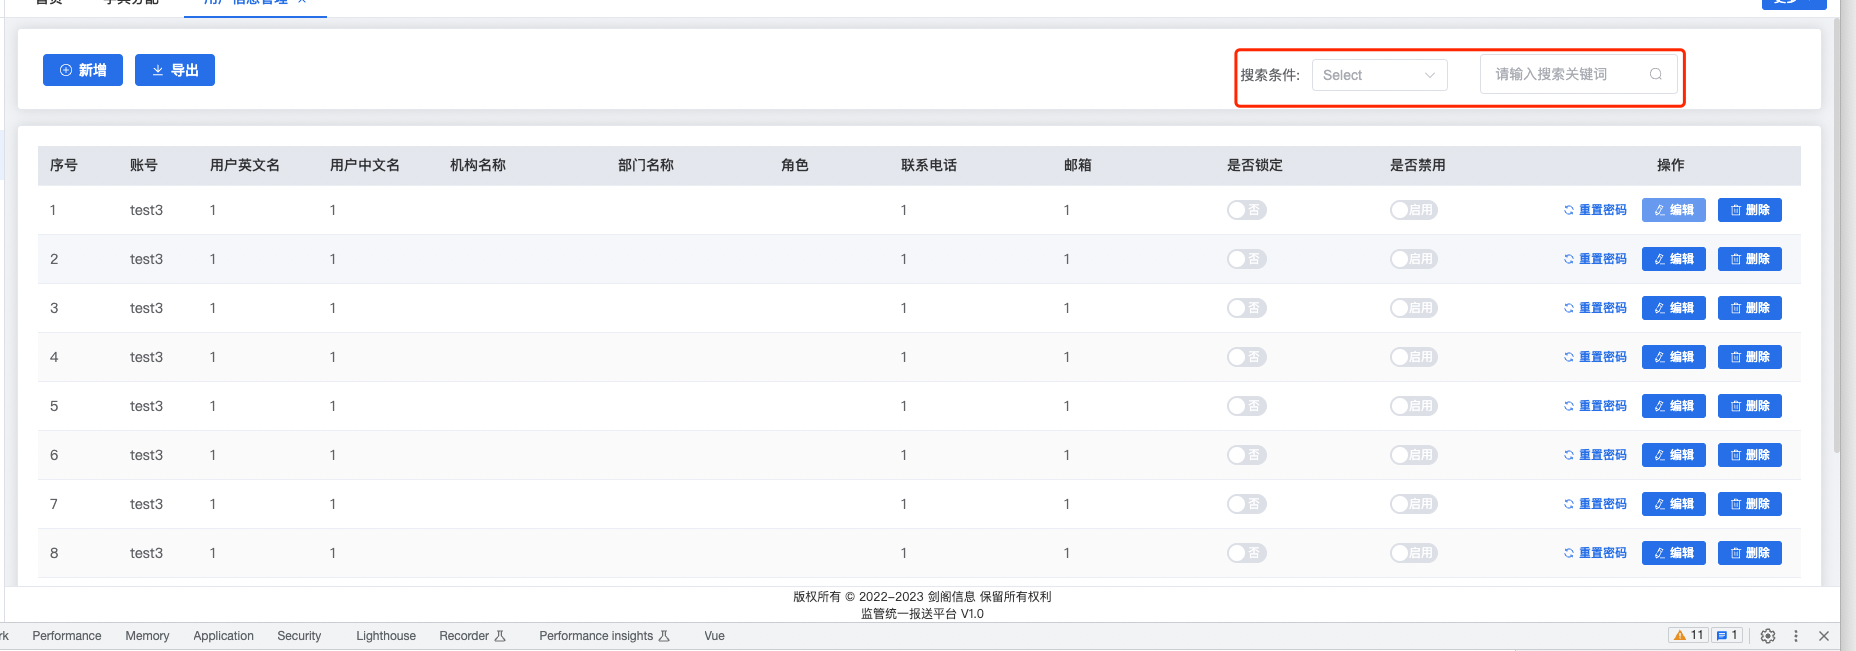
1
2
3
4
5
6
7
8
9
10
11
12
13
14
15
16
| <div class="head-search">
<el-form-item>
<el-col :span="11">
<el-form-item label="搜索条件:">
<el-select v-model="value" class="m-2" placeholder="Select">
<el-option v-for="item in options" :key="item.value" :label="item.label" :value="item.value" />
</el-select>
</el-form-item>
</el-col>
<el-col :span="13">
<el-form-item>
<el-input placeholder="请输入搜索关键词" class="w-50 m-2" :suffix-icon="Search" size="large" />
</el-form-item>
</el-col>
</el-form-item>
</div>
|
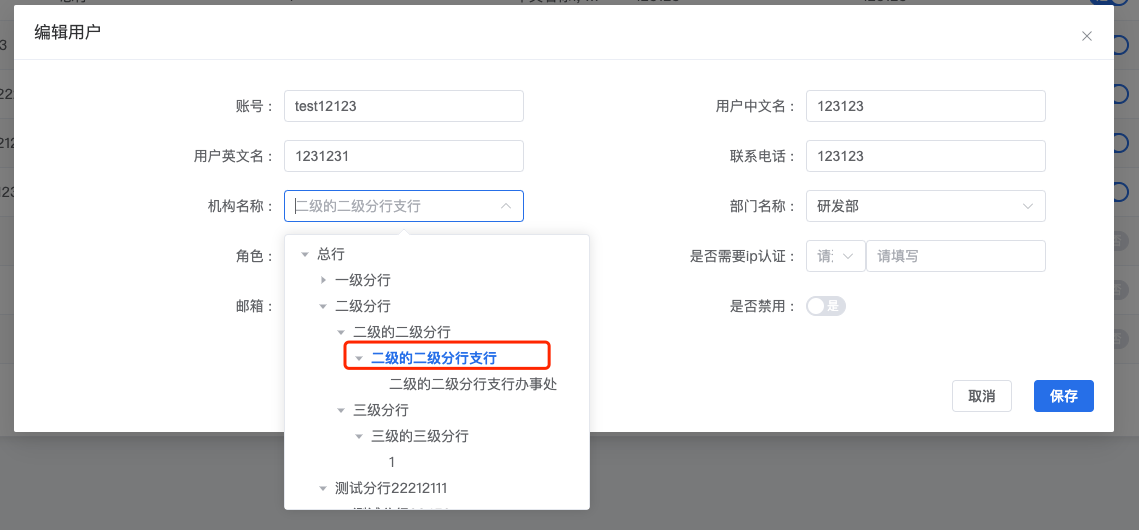
使用el-tree-select代码实现
1
2
3
4
5
6
7
8
9
10
11
12
13
14
15
16
17
18
19
20
21
22
23
24
25
26
27
28
29
30
31
32
33
34
35
36
37
38
39
40
41
42
43
44
45
46
47
48
49
50
51
52
53
54
55
56
57
58
59
60
61
62
63
64
65
66
67
68
69
70
71
72
73
74
75
76
77
78
79
80
| <el-form-item :label="$t('user.orgName')" prop="orgId">
<el-tree-select
class="select-width"
:placeholder="$t('form.selHolder').concat($t('user.orgName'))"
v-model="userReq!.orgId"
:props="defaultProps"
node-key="id"
:data="orgTreeList"
:filter-node-method="filterNodeMethod"
@change="getDepartList(1)"
check-strictly
:default-expanded-keys="userReq!.orgId?[userReq!.orgId]:[]"
:default-checked-keys="userReq!.orgId?[userReq!.orgId]:[]"
filterable
>
</el-tree-select>
</el-form-item>
const dialogProps = ref<DialogProps>({
title: "",
user: {} as UserEdit
});
let userReq = reactive<UserInfo.ReqUser>({
loginId: "",
userCname: "",
userEname: "",
tel: "",
roleLists: [],
isIpAuth: "",
ip: "",
email: "",
isDisabled: ""
});
// 接收父组件传过来的参数
const acceptParams = (params: DialogProps) => {
dialogProps.value = params;
if (dialogProps.value.user.id) {
userReq.orgId = dialogProps.value.user.coreOrg.id;
}
//初始化下拉框属性
initSelected();
Object.assign(userReq, dialogProps.value.user);
if (dialogProps.value.user.id) {
let roleLists = [];
for (let item of dialogProps.value.user.roleLists) {
roleLists.push(item.id);
}
userReq.roleLists = roleLists;
userReq.departId = dialogProps.value.user.coreDepartment.id;
} else {
userReq.orgId = undefined;
userReq.departId = undefined;
userReq.roleLists = [];
}
centerDialogVisible.value = true;
};
const orgTreeList = ref();
//初始化下拉框
const initSelected = async () => {
//获取机构属性列表,数组对象
const { data } = await getOrgTreeSelectList();
orgTreeList.value = data;
//获取角色列表
getRoleList();
//判断orgId是否为空,不为空初始化部门列表
if (userReq.orgId) {
getDepartList();
}
};
//树形选择框过滤方法
const filterNodeMethod = (orgInputValue: string, data: OrgInfo.ResOrgTreeSelect) => data.name.includes(orgInputValue)
|
实现效果:
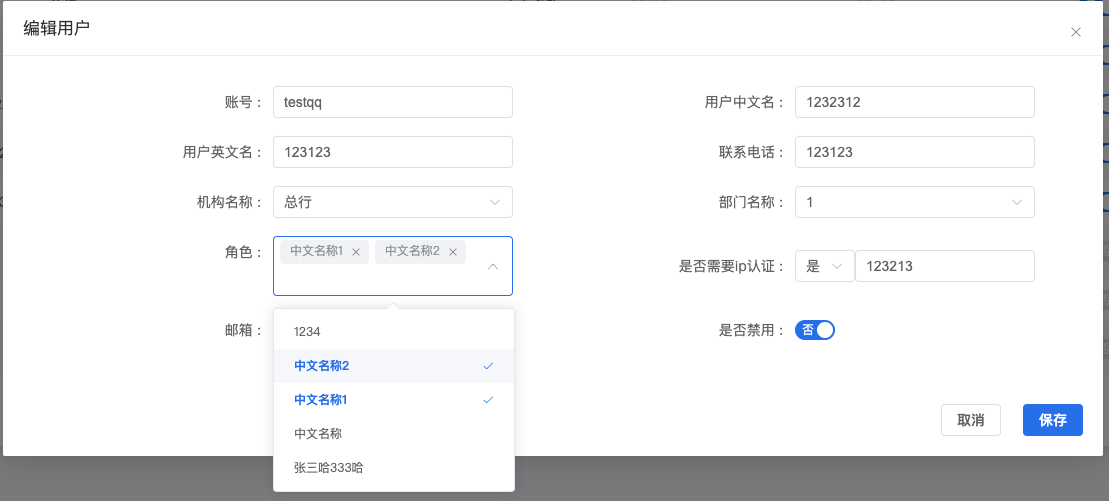
使用el-select-v2代码实现
1
2
3
4
5
6
7
8
9
10
11
12
13
14
15
16
17
18
19
20
21
22
23
24
25
26
27
28
| <el-form-item :label="$t('user.roleName')" prop="selectedRoleId">
<el-select-v2
v-model="userReq!.roleLists"
filterable
:options="roleOptions"
:placeholder="$t('form.selHolder').concat($t('user.roleName'))"
class="select-width"
multiple
/>
</el-form-item>
const roleList = ref<RoleInfo.ResAllRoleList[]>([]);
//初始化角色列表
const getRoleList = () => {
getAllRoleList().then(({ data }) => {
roleList.value = data;
roleOptions.value = Array.from({ length: roleList.value.length }).map((_, idx) => ({
value: +`${roleList.value[idx].id}`,
label: `${roleList.value[idx].roleShowName}`
}));
});
};
const roleOptions = ref();
roleOptions.value = Array.from({ length: roleList.value.length }).map((_, idx) => ({
value: `${roleList.value[idx].id}`,
label: `${roleList.value[idx].roleShowName}`
}));
|
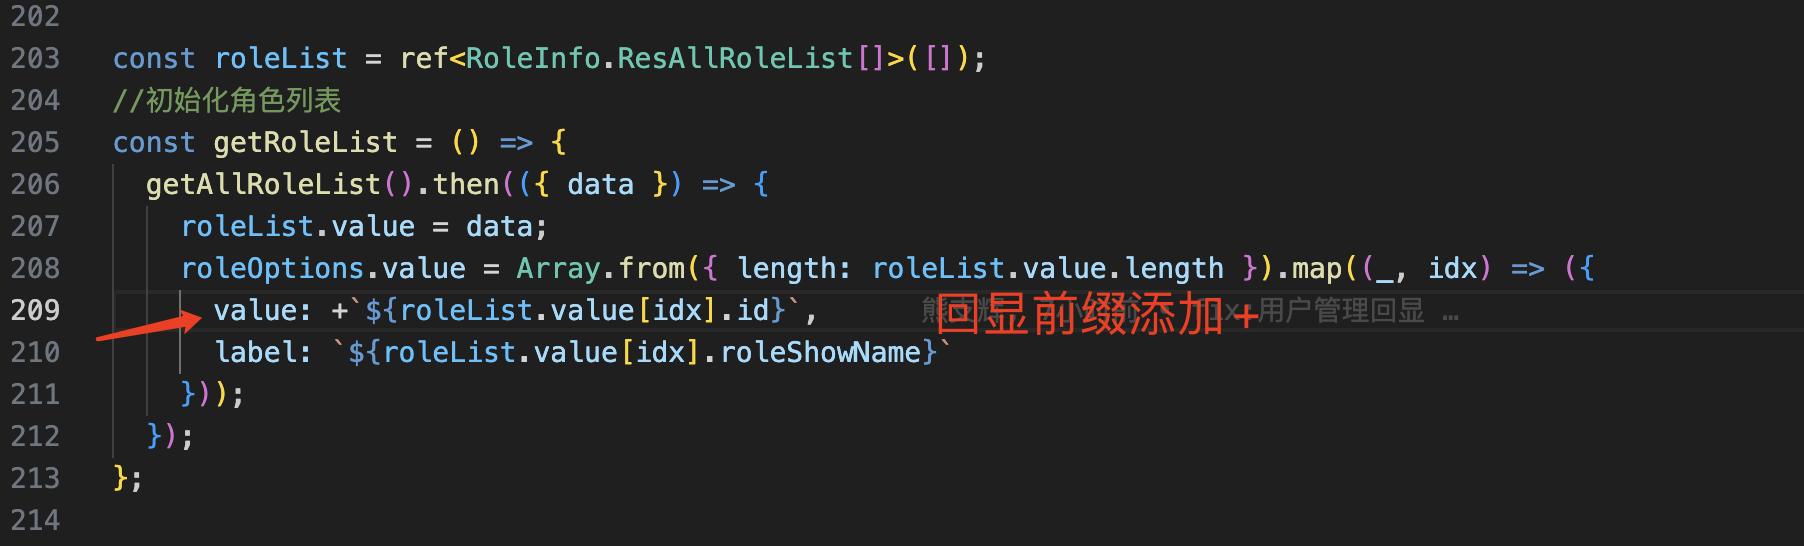
实现效果和机构下拉框做联动
8.子组件调用父组件的方式,采用 $emit 方式
1
2
3
4
5
6
7
8
9
10
11
12
13
14
15
16
17
18
| //子模块 DialogForm
let $emit = defineEmits(["flushUserTable"]);
//回调父组件的方法
$emit("flushUserTable", userReq.id);
//父模块
<DialogForm ref="dialogRef" @flush-user-table="flushUserTable" />
//新增修改保存后回调父方法
const flushUserTable = (userId?: number) => {
if (userId) {
getUserTableList(pageNo.value);
} else {
//新增清空查询条件并返回第一页返回
userProp.value = undefined;
userPropValue.value = undefined;
getUserTableList();
}
};
|
父组件调用子组件的方式
1
2
3
4
5
6
7
8
9
10
11
12
13
14
15
16
17
18
19
20
21
22
23
24
25
26
27
28
29
30
31
32
33
34
35
36
37
38
39
40
41
42
43
44
| //子模块
//暴露方法给父组件传递参数
defineExpose({
acceptParams
});
// 接收父组件传过来的参数
const acceptParams = (params: DialogProps) => {
dialogProps.value = params;
if (dialogProps.value.user.id) {
userReq.orgId = dialogProps.value.user.coreOrg.id;
}
//初始化下拉框属性
initSelected();
Object.assign(userReq, dialogProps.value.user);
if (dialogProps.value.user.id) {
let roleLists = [];
for (let item of dialogProps.value.user.roleLists) {
roleLists.push(item.id);
}
userReq.roleLists = roleLists;
userReq.departId = dialogProps.value.user.coreDepartment.id;
} else {
userReq.orgId = undefined;
userReq.departId = undefined;
userReq.roleLists = [];
}
centerDialogVisible.value = true;
};
父组件
<DialogForm ref="dialogRef" @flush-user-table="flushUserTable" />
const openDialog = (title: string, rowData: UserEdit) => {
const params = {
title,
user: { ...rowData }
};
dialogRef.value?.acceptParams(params);
};
|
前端属性要设置为空,赋值为undefined
1
2
3
4
5
6
7
8
9
10
11
12
13
| Object.assign(userReq, dialogProps.value.user);
if (dialogProps.value.user.id) {
let roleLists = [];
for (let item of dialogProps.value.user.roleLists) {
roleLists.push(item.id);
}
userReq.roleLists = roleLists;
userReq.departId = dialogProps.value.user.coreDepartment.id;
} else {
userReq.orgId = undefined;
userReq.departId = undefined;
userReq.roleLists = [];
}
|
vue的三目运算符整理(?)
1
2
3
4
5
6
7
8
9
10
11
12
13
14
15
| <el-tree-select
class="select-width"
:placeholder="$t('form.selHolder').concat($t('user.orgName'))"
v-model="userReq!.orgId"
:props="defaultProps"
node-key="id"
:data="orgTreeList"
:filter-node-method="filterNodeMethod"
@change="getDepartList(1)"
check-strictly
:default-expanded-keys="userReq!.orgId?[userReq!.orgId]:[]"
:default-checked-keys="userReq!.orgId?[userReq!.orgId]:[]"
filterable
>
</el-tree-select>
|
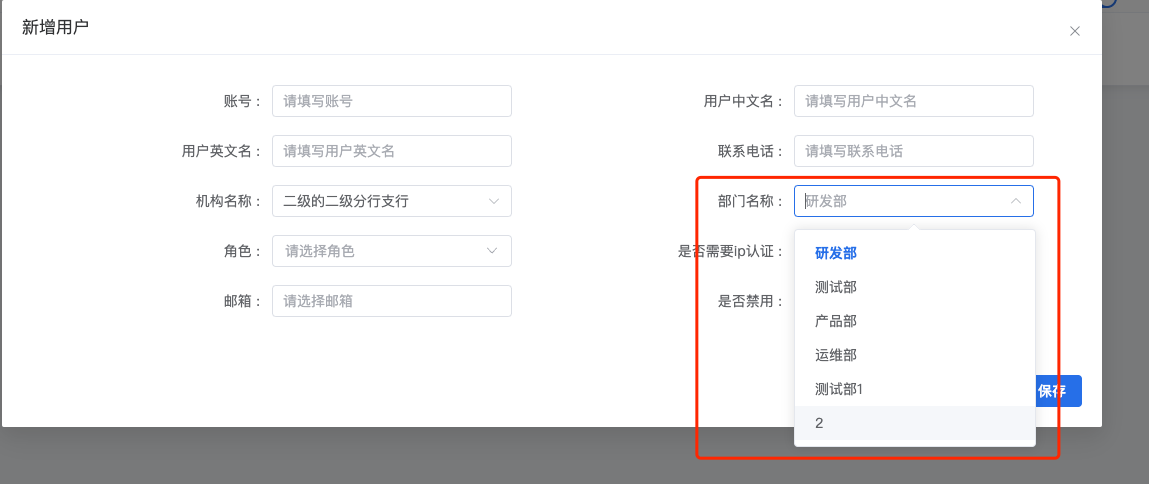
一般el-select组件数据异步加载的编写方式
1
2
3
4
5
6
7
8
9
10
11
12
13
14
15
16
17
18
19
20
21
22
23
24
| <el-form-item :label="$t('user.deptName')" prop="depart">
<el-select
v-model="userReq!.departId"
filterable
:placeholder="$t('form.selHolder').concat($t('user.deptName'))"
class="select-width"
>
<el-option v-for="item in departList" :key="item.id" :label="item.name" :value="item.id" />
</el-select>
</el-form-item>
const departList = ref<RoleInfo.DepartmentVO[]>([]);
//选中机构后的查询部门列表
const getDepartList = (flag?: number) => {
if (flag) {
//机构改变时清空部门id
userReq.departId = undefined;
}
const orgNumber = Number(userReq.orgId);
const orgIds = [orgNumber] as number[];
queryDepartmentVO({ ids: orgIds }).then(({ data }) => {
departList.value = data;
});
};
|
实现效果:
对象数组取对应属性,然后重新组成新数组的代码示例
1
2
3
4
5
6
7
8
9
10
11
12
13
14
15
16
17
18
19
20
21
22
23
24
25
26
27
| // 接收父组件传过来的参数
const acceptParams = (params: DialogProps) => {
dialogProps.value = params;
if (dialogProps.value.user.id) {
userReq.orgId = dialogProps.value.user.coreOrg.id;
}
//初始化下拉框属性
initSelected();
Object.assign(userReq, dialogProps.value.user);
if (dialogProps.value.user.id) {
  let roleLists = [];
  for (let item of dialogProps.value.user.roleLists) {
    roleLists.push(item.id);
  }
  userReq.roleLists = roleLists;
  userReq.departId = dialogProps.value.user.coreDepartment.id;
} else {
  userReq.orgId = undefined;
  userReq.departId = undefined;
  userReq.roleLists = [];
}
centerDialogVisible.value = true;
};
|
参考博客:
https://blog.csdn.net/weixin_49046027/article/details/123370324
键盘敲击触发事件,onkeyup事件(onkeydown和onkeypress),示例代码是回车事件
1
2
3
4
5
6
7
8
9
10
11
| <el-form-item>
<el-input
:placeholder="$t('form.queryKey')"
v-model="userPropValue"
class="w-50 m-2"
:suffix-icon="Search"
size="large"
@blur="queryUserTableList"
@keyup.enter="queryUserTableList"
/>
</el-form-item>
|
vue判断字符串属性不是空
1
2
3
4
5
6
7
8
9
10
11
12
13
14
| //根据条件查询用户信息
const queryUserTableList = async () => {
if (userProp.value == null || userProp.value.length == 0) {
ElMessage.error(t("form.selHolder"));
return;
}
getUserTableList();
};
//判断属性不为undefined
//判断orgId是否为空,不为空初始化部门列表
if (userReq.orgId) {
getDepartList();
}
|
